
How to install JivoChat code in Thinkific
Included for free in plans
VIPPROBASEIn this tutorial you will learn how to install JivoChat on Thinkific platform. Just follow these steps:
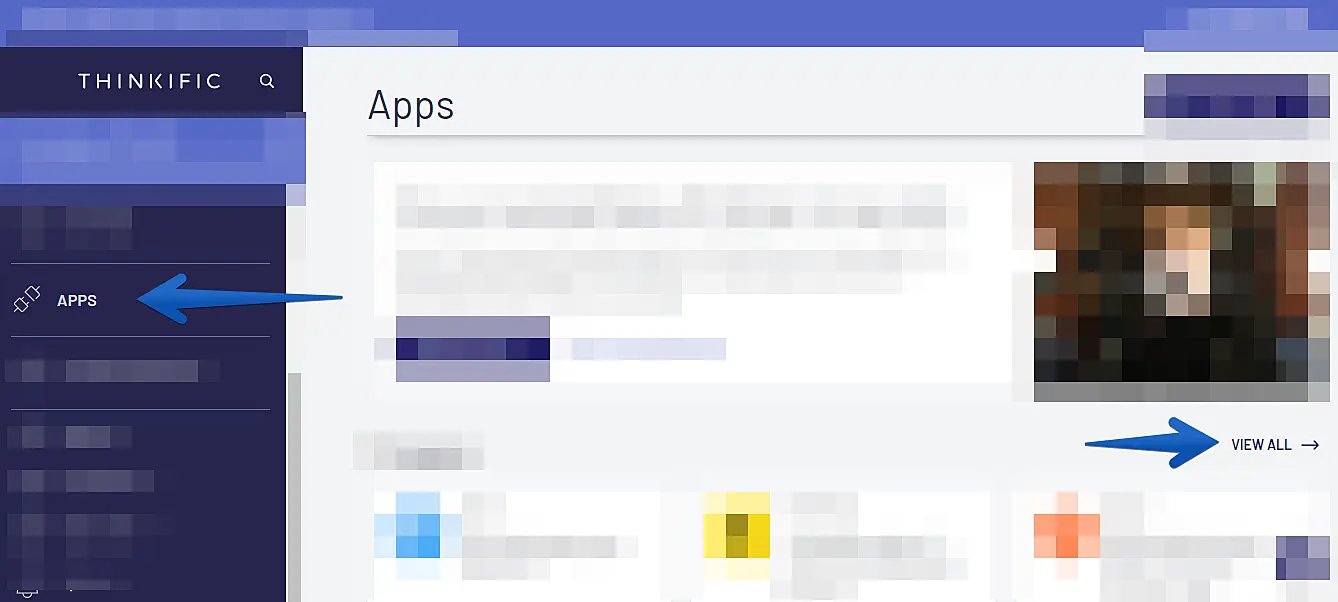
Step 1: Upon entering your Thinkific dashboard, click on "APPS" -> Later on "View All"
Step 2:
- Search for "JivoChat" in the search bar
- Click on the tab that appears

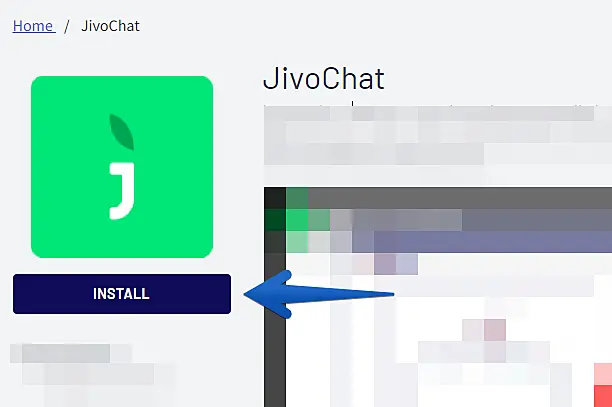
Step 3: Click "Install"
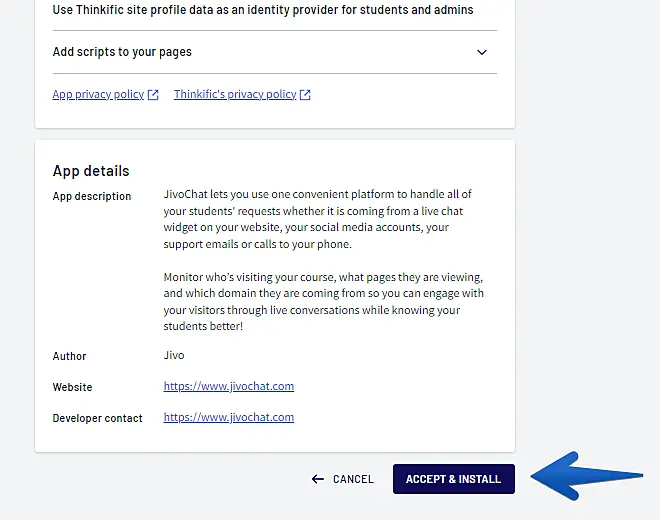
Step 4: Click "Accept & Install"
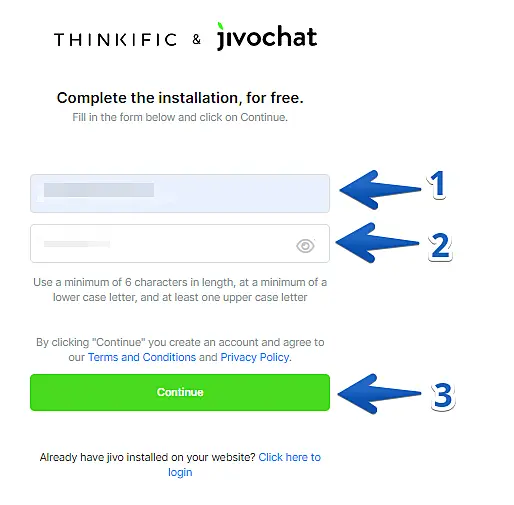
Step 5:
- Enter your JivoChat account registration email
- Enter your JivoChat account password
- Click "Continue"
Step 6: Then click "Login to JivoChat APP" button

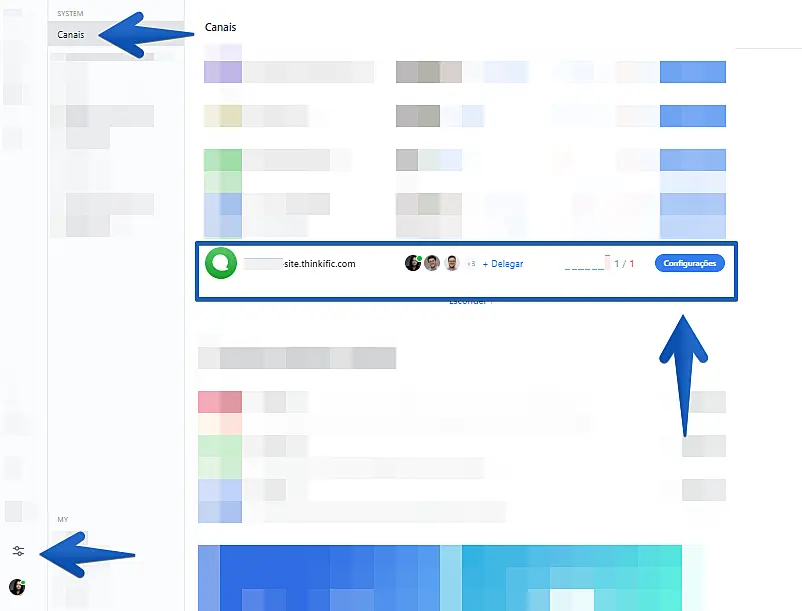
Step 7: To verify the installation, click "Settings" -> "Channels" and the site will appear installed in your dashboard
Step 8: Open your website and check the installed widget in the lower right corner
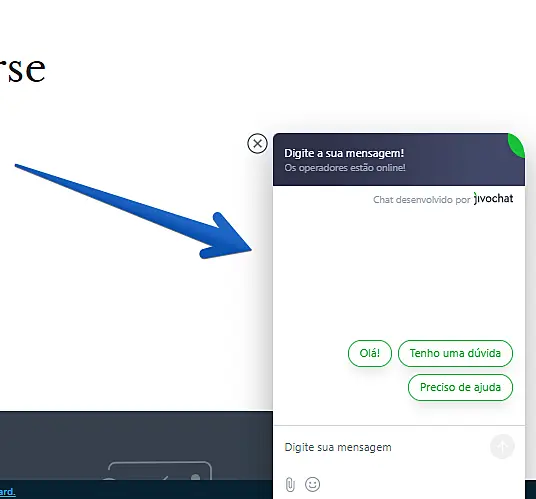
Ready! Now just go online and serve your visitors in real time.

Related articles

Have questions?
Ask in the live chat, we are ready to help around the clock