
How to use and send a WhatsApp Campaign from JivoChat
Would you want to send the same message to many customers or announce something important?
Then, our WhatsApp campaign feature can help you to reach your goals
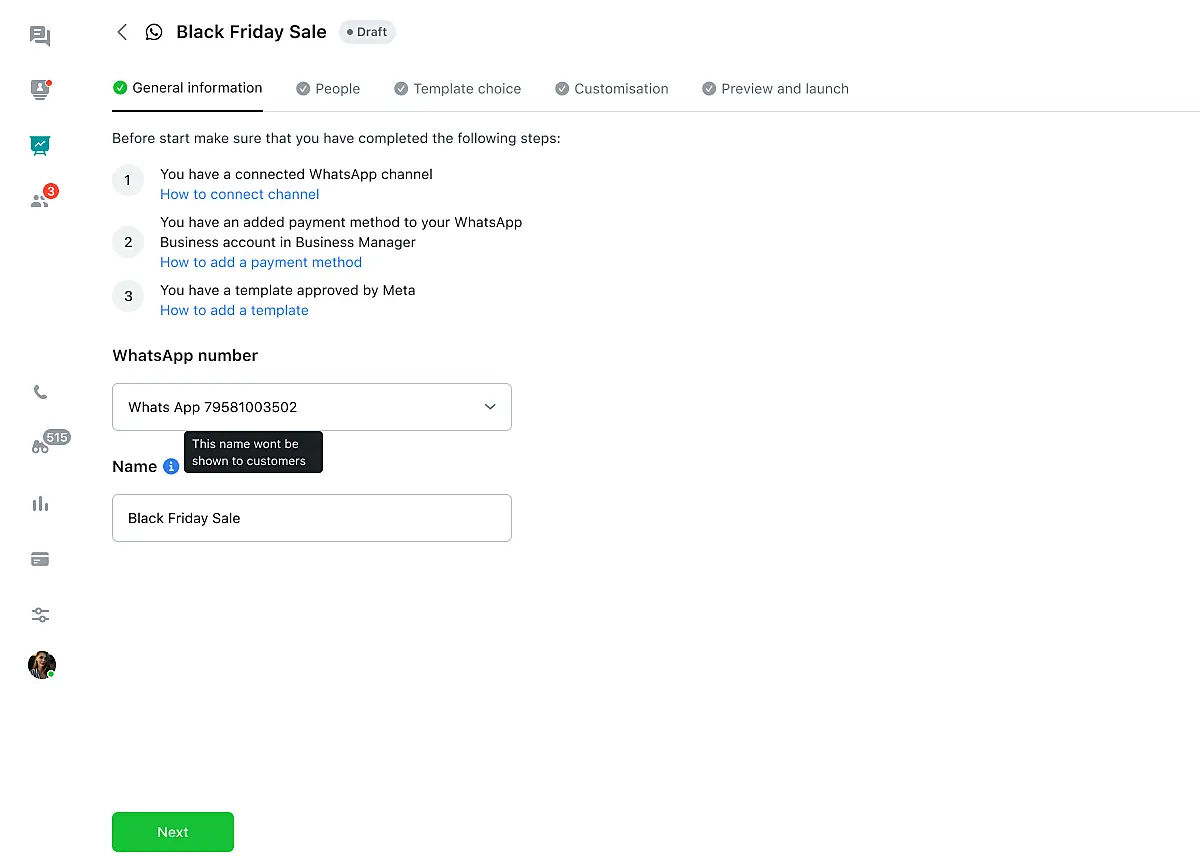
Before you start any campaign, the following conditions must be met:
- You must have a connected WhatsApp channel
How to connect channel messages will be sent from this number to your customers on behalf of the company
- You should have added a payment method to your WhatsApp Business account in Business Manager
How to add a payment method- Meta will charge you for each delivered template from this card
- You should have a template approved by Meta
How to add a template - WhatsApp allows you to initiate a conversation with a client only by using an approved template, otherwise the client will not receive the message
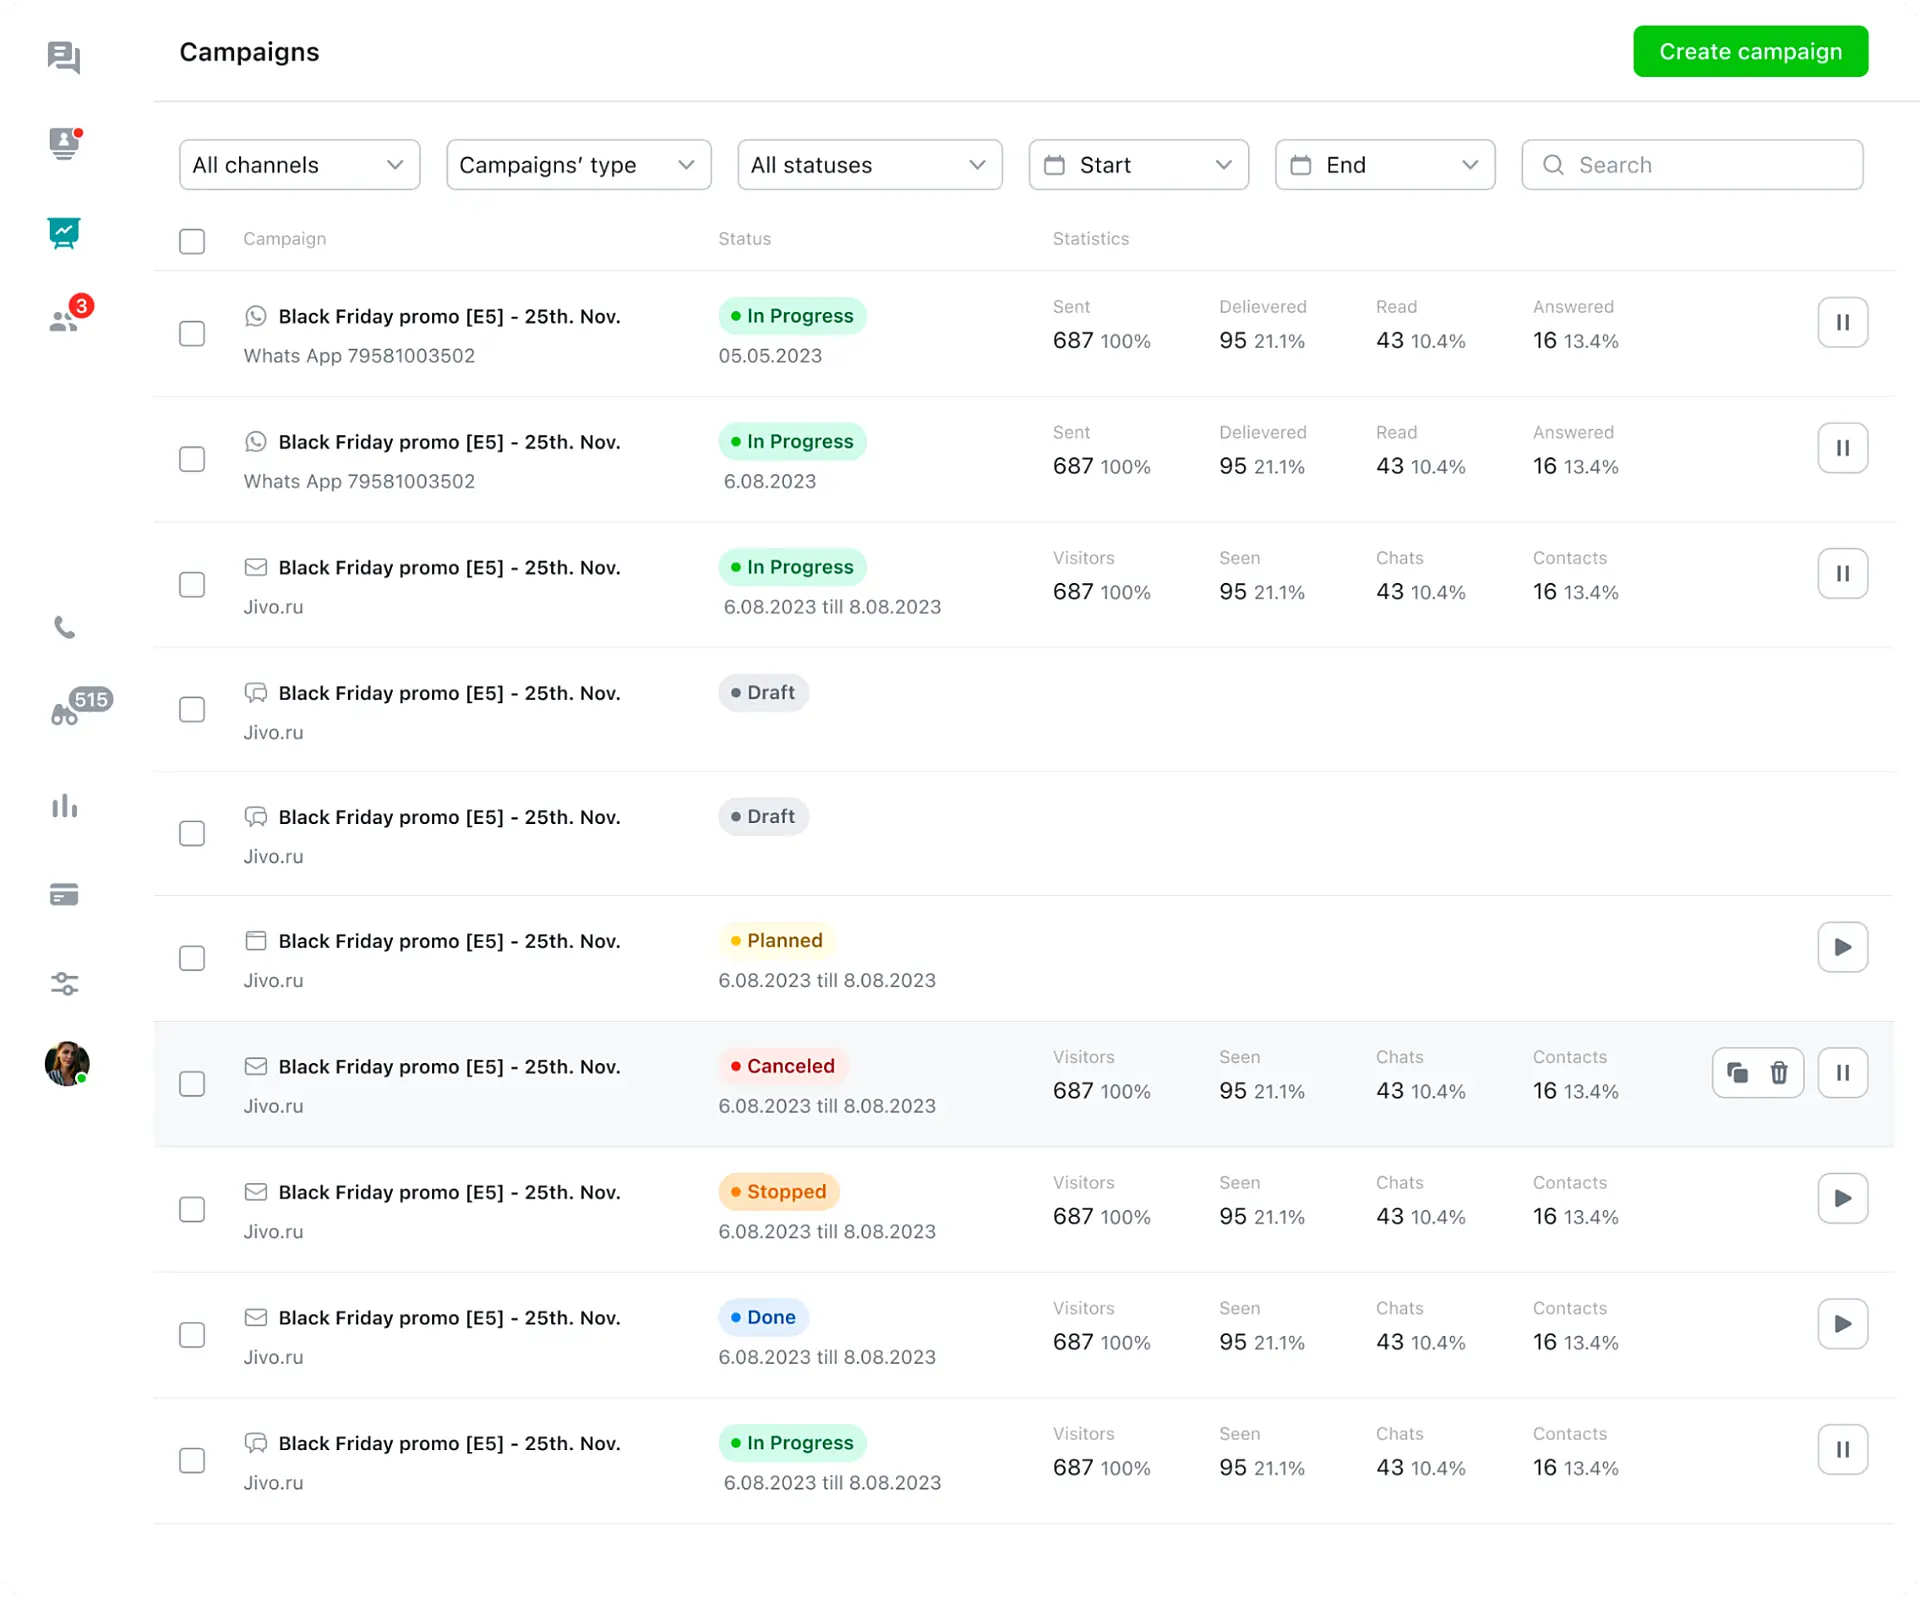
To create a campaign follow a few steps
- Go to the Marketing menu and click "Create campaign"
- Choose the WhatsApp number from which the campaign will be sent and set the Name for the campaign. This name is only for you. Your clients can’t see it.
then click on Next
- Choose the conditions for the clients you need the campaign for.
You can set them up from scratch or choose the conditions you set earlier.
Please note: customers will fall under the conditions if they meet each of them
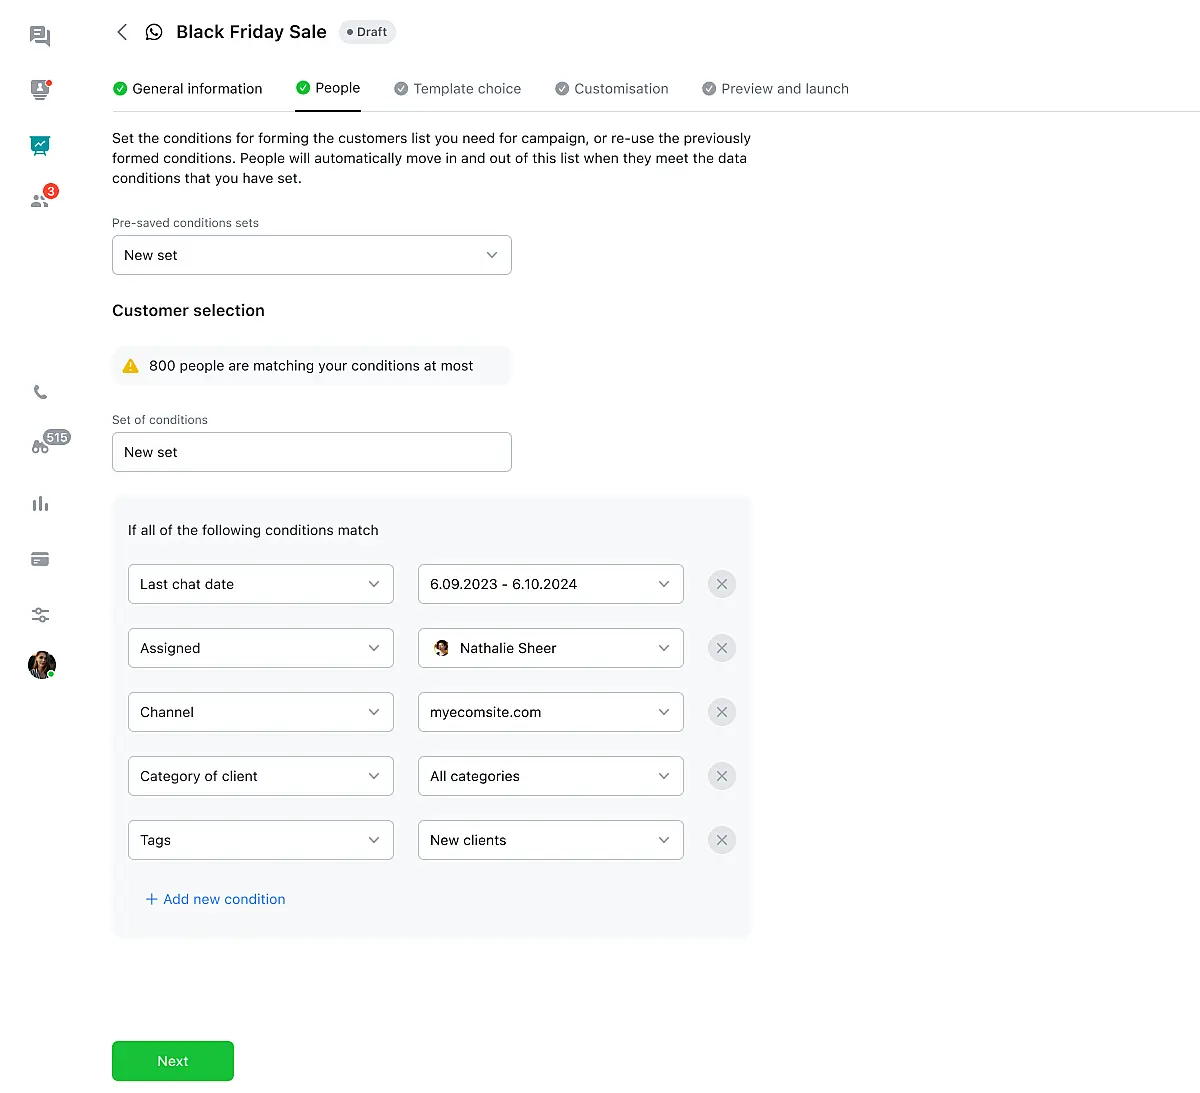
Here you can also delete a previously created set of conditions or edit it.
If you don’t have customers in our CRM you can easily import them. Check tutorial here
- After setting the conditions, you will see the maximum number of clients that fit this set.

This number will help you plan a budget for campaigns - Meta will charge you for each delivered template, Jivo only sends one template to one client
Click on Next to continue
- You have to choose a template for your campaign.
Note that you can only select one template without variables (until the next update) and only in one language. If you want to send a template to a multilingual audience, then make several campaigns

Also pay attention to the template category, different categories are charged differently on the Meta side, you can check the price here
- If your template contains a media file, then it's time to upload it. If not, just make sure the template is correct and click next
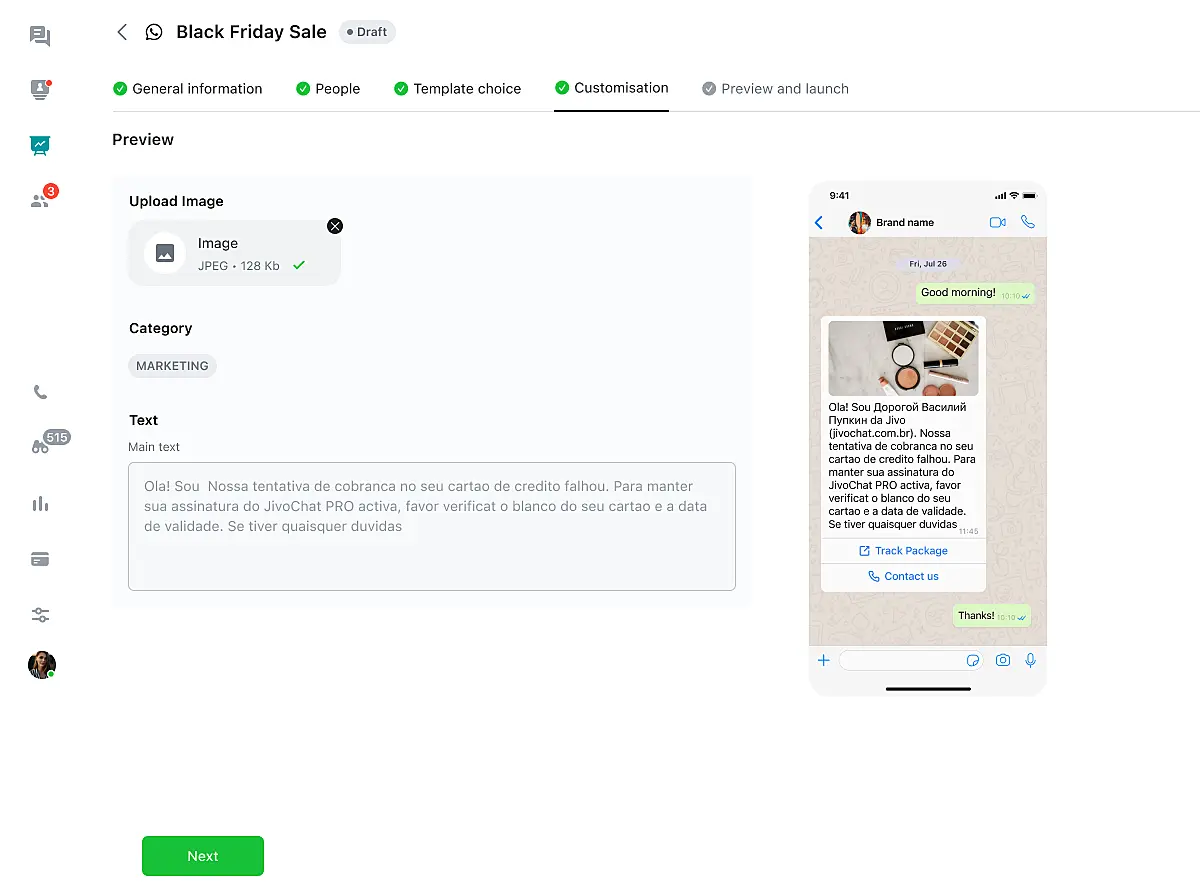
- This is the last step: Make sure that all the information is correct, you have chosen the right number, the right conditions for customers in your campaign and you are satisfied with the template preview on the right - this is how your customers will see it.
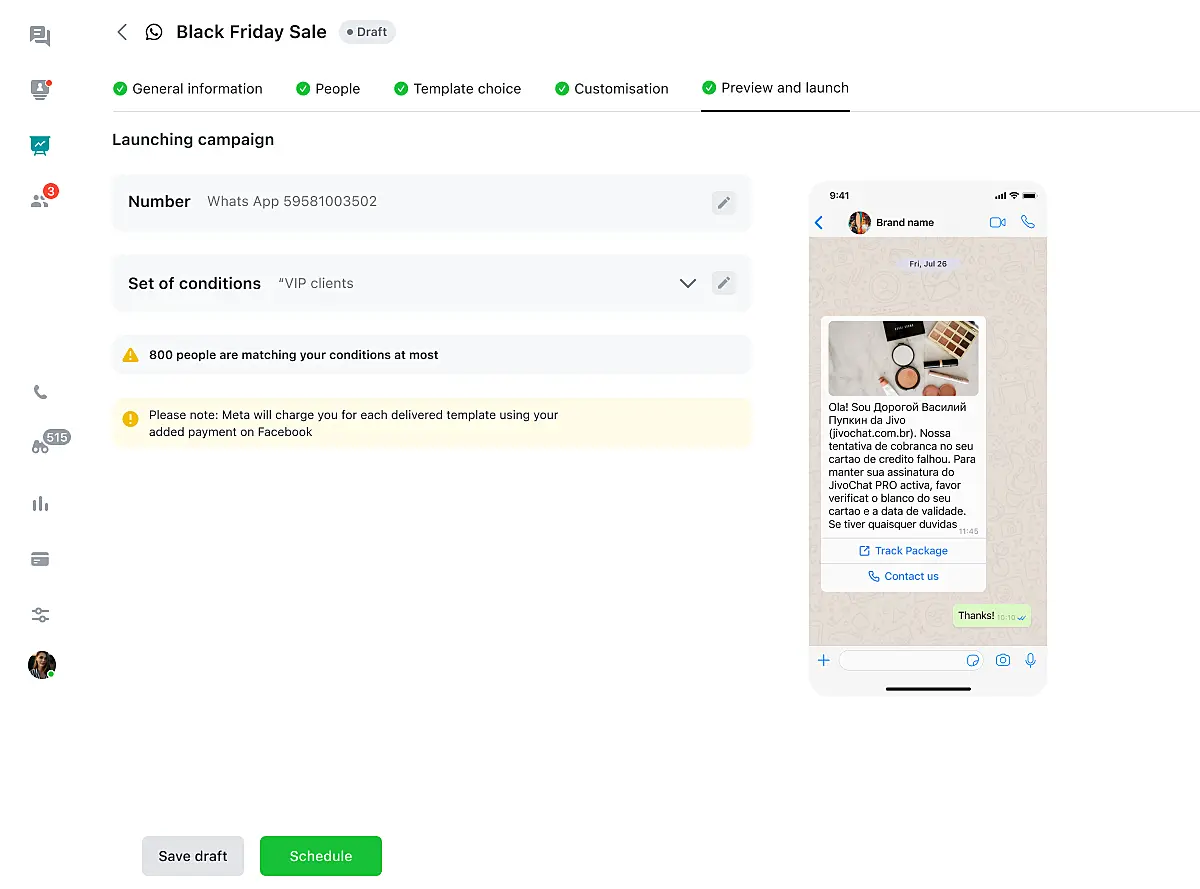
Also check again the maximum number of recipients. The template may not reach all customers, but each delivered message will be paid
if you agree, click "Schedule"
The campaign will start immediately, but it will take some time depending on the number of recipients.
Now you just need to wait for the answers of your customers in the inbox (Contact center)

